Users mainly change their SSID name to fit their personal preferences. Sometimes, it is also helpful if you are surrounded by multiple networks and want to add a unique name to your Wi-Fi so you can quickly identify it.
If you want to change the network name or SSID, we will walk you through the steps so you can do it easily by following simple steps. Although it is a very basic process, most users don’t know how to do it and need help.
Whether you are new to your router settings or don’t know the proper method to do this, most people don’t know about the admin panel, how they access it, and how they modify their network settings.
That is why this guide will be helpful for those who are new. So, the steps provided below will help you achieve your personalized Wi-Fi name. It’s a very easy and a few minutes process; follow the guide.
Why Change or Customize Your Wi-Fi Name (SSID)?
Your Wi-Fi name is also known as the SSID (Service Set Identifier), which helps distinguish your network from others nearby. Changing it offers several benefits:
- Easier to Identify: A custom name makes it easy to recognize your network, especially in areas with many Wi-Fi signals.
- Better Security: Default SSIDs can reveal the router brand or model, which may make your network an easy target for attackers.
- Avoid Confusion: If multiple networks use the same default name, it can be hard to tell which one is yours.
How to Change Your Wi-Fi Name (SSID)?
Here are the detailed step-by-step instructions that you can follow:
Step 1. Connect to Your Wi-Fi:
First, make sure your phone or computer is connected to the Wi-Fi network you want to customize.
Step 2. To Access the Admin Panel:
Open a web browser on your device. In the address bar type: 10.0.0.1 or http://10.0.0.1 and press Enter.
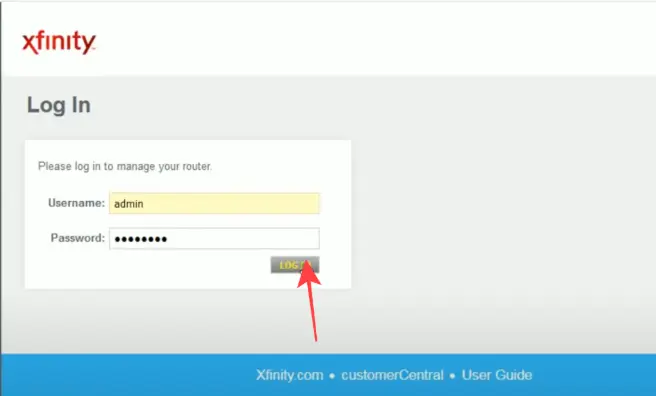
Step 3. Log In to the Admin Panel:
Enter your router’s admin username and password and click login. These credentials are often:
- Username: admin
- Password: password
Note: (These login credentials are different from your admin panel username and password.) You can check the guide to find your router’s default credentials. If you’ve changed them before and now forgot, you can reset your router to factory settings.
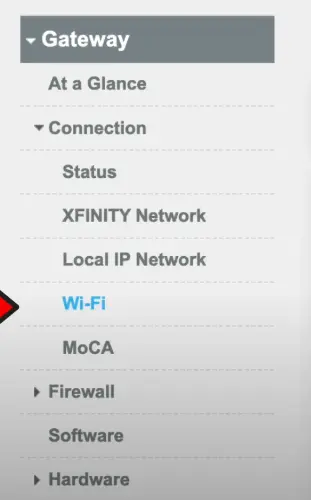
Step 4. Navigate to Wi-Fi Settings:
After logging in, go to Gateway > Connection > Wi-Fi. Here, you’ll find the Private Wi-Fi Network settings.
Step 5. Now Edit the SSID Name and Save Changes:
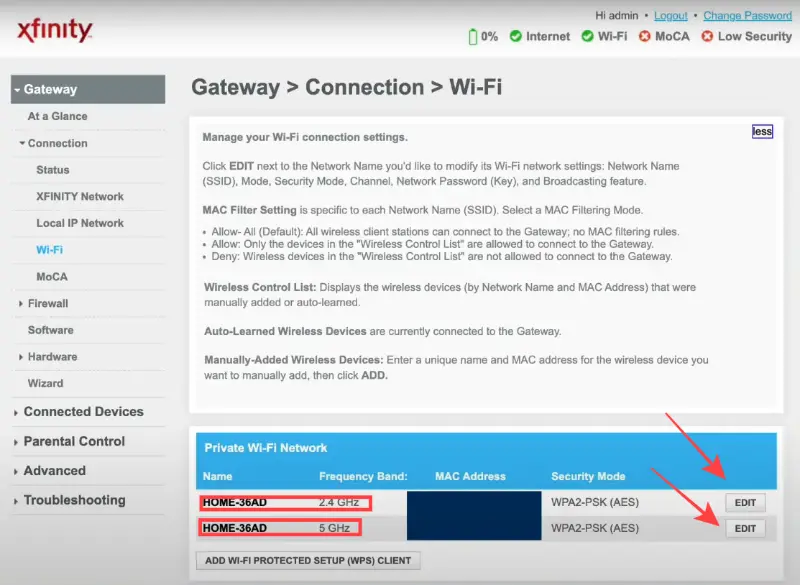
Under Private Wi-Fi Network, find your current Wi-Fi name (SSID) and click the Edit button next to your network name. After making changes, click Save Settings to confirm.
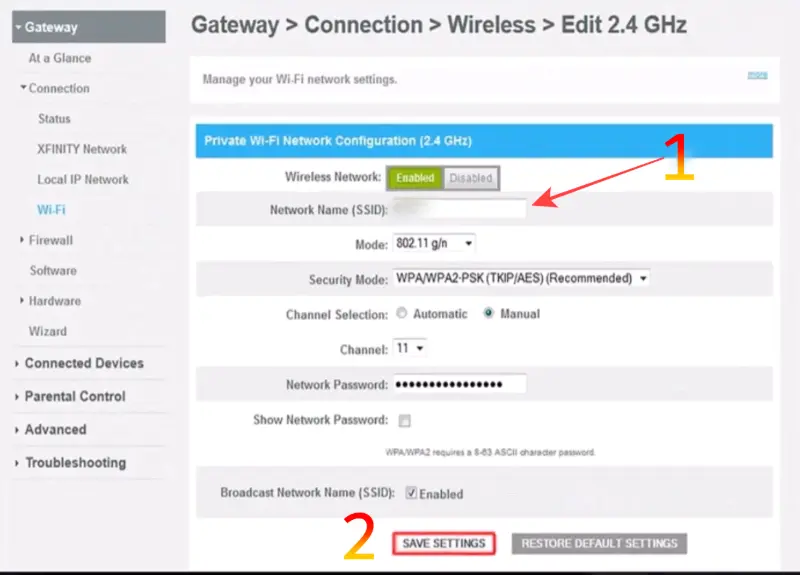
Note: If your router shows two bands (2.4 GHz and 5 GHz), click edit next to each one and give them the same name for easier device management.
Note: Your device may disconnect, but you can reconnect it using the new Wi-Fi name (SSID).